

Gas Generator Only Runs on Choke? Carburetor Repair Guide to Fix the Problem
* This site contains affiliate links for which we may be compensated.
* This site contains affiliate links for which we may be compensated.
When a gas generator will only stay running with the choke partially or fully on, it usually means the engine is starving for fuel and running too lean. The choke is artificially enriching the mixture just enough to keep it alive. In most cases, that points to a dirty, varnished, or partially blocked carburetor—not a major engine failure. This step-by-step carburetor repair guide walks you through what to check and how to clean or repair the carb before calling a shop. For a broader look at how fuel, spark and electrical parts fit together, you can also explore the overview in Generator Parts and Repairs.
What “Only Runs on Choke” Really Tells You
Under normal conditions, you start the generator with the choke ON, then move it to RUN once it warms up. If your generator:
- Stalls or dies as soon as you open the choke
- Only runs smoothly at half-choke or full-choke
- Surges, hunts, or pops when the choke is OFF
then the carburetor is almost certainly not delivering enough fuel. Common causes include:
- Gummed-up main jet or idle jet from stale fuel
- Dirt, rust, or water in the float bowl
- Partially clogged fuel filter, petcock, or tank outlet
- Air leaks at carb gaskets or intake boot
YAMAKATO Huayi P27-1D Gasoline Generator Carburetor Kit OEM for Champion Predator Generac 420cc 439cc 459cc GX390 Powered 6500 8750 9000 5500 7000 8000 7500 9500 etc.……

TURBOTUNITY Generator Carburetor Kit for Predator 4000 4375 Champion Honda Generac 3500 4000 3000 4500 4375 3550 3650 GP 3250 3300 Watt 196cc 208cc 212cc 224cc etc.

SIMPERAC Carburetor for Predator 420cc Generator 9000 8750 7000 6500 5500 Watt 13HP 14HP 15HP 16HP Gasoline Portable Generator with Air Filter Fuel Shut-off Valve
Start with Safety
Before you crack fuel lines or open the carburetor:
- Shut the generator off and let the engine cool completely.
- Turn the fuel valve/petcock to OFF (if equipped).
- Disconnect the spark plug boot so the engine cannot accidentally start.
- Work outdoors or in a very well-ventilated space, away from open flames or sparks.
- Keep a small fire extinguisher nearby and avoid smoking around fuel.
Tools and Supplies That Make Carb Work Easier
You don’t need a full shop, but the right tools help a lot:
- Basic hand tools: Phillips/flat screwdrivers, nut drivers, metric and SAE sockets and wrenches.
- Carburetor cleaner spray for dissolving varnish and gum.
- Carb jet cleaning tools or fine wire for tiny orifices.
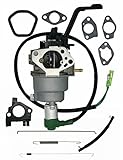
- Generator carburetor repair kit or a full replacement carb matched to your engine model.
- Inline fuel filter and fresh fuel line if the originals are dirty or cracked.
- Small drain pan and shop rags for catching and wiping up fuel.
If you’re dealing with a specific inverter or dual-fuel unit and want to see how parts (including carburetors) are organized by model, a brand-focused parts page such as Genmax Generator Parts can be a helpful reference for how to look up carb kits and related components.
Step 1: Rule Out Simple Fuel Supply Problems
Before blaming the carburetor itself, verify that fuel can actually reach it:
- Confirm there is fresh gasoline in the tank (ideally less than 1–2 months old if not treated).
- Make sure the fuel valve/petcock is fully ON.
- Loosen the drain screw on the carb bowl or disconnect the fuel line at the carb inlet while holding a container under it—fuel should flow in a steady stream.
- If flow is weak, intermittent, or stops, suspect a clogged valve, filter, or tank outlet. Replace with a new valve and small-engine fuel filter.
- Crack the fuel cap loose; if the engine suddenly runs better, the cap vent may be blocked.
If fuel flow to the carb is restricted, fix that first—no amount of carb cleaning will help if the carb isn’t being fed.

Snwoygr 10 PCS Gas Inline Fuel Filters with Magnet for Kawasaki, Kohler, John Deere, Lawn Mower, Small Engine, Third Generation Universal Replacement Fuel Filter for 1/4 IN and 5/16 IN

HIPA Fuel Filter for Husqvarna 128LD 124 125 128 Series String Trimmer Brush Cuter Pole Pruner Edger Weedeater Poulan Craftsman Gas Leaf Blower - Pack of 10

TRHSIFF 10 PCS 1/4 Inch and 5/16 Inch Gas Inline Fuel Filters with Magnet for Kawasaki, Kohler, John Deere, Lawn Mower, Small Engine, Upgrade Universal Replacement Fuel Filter with 10 Clips
Step 2: Check the Air Filter and Intake
A plugged air filter or damaged intake boot can complicate diagnosis:
- Remove the airbox cover and take out the filter element.
- If it is saturated with oil, caked in dust, or falling apart, replace it with a fresh generator air filter.
- Inspect the airbox for mouse nests, leaves, or other debris blocking airflow.
- Check the rubber boot between the airbox and carb for cracks and ensure clamps are tight (no unmetered air leaks).
If the generator still only runs on choke after confirming good fuel flow and intake, it is time to pull the carburetor.
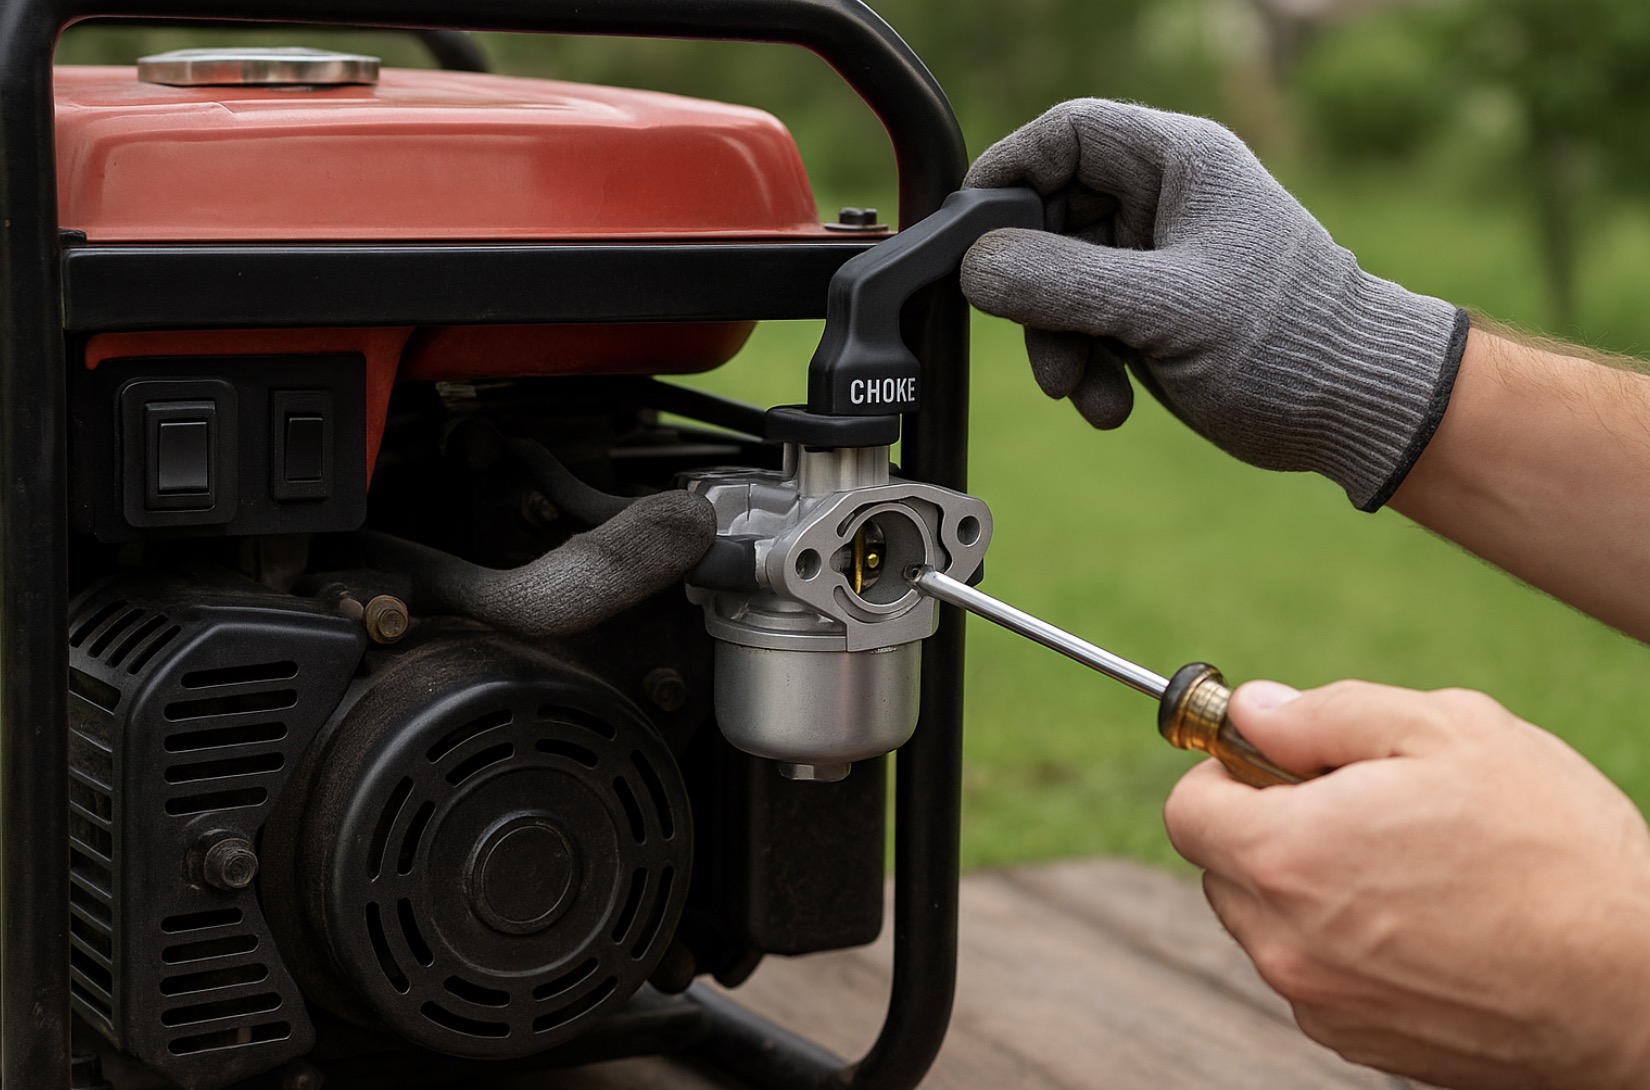
Step 3: Remove the Carburetor
Most small-generator carburetors come off in a predictable sequence:
- Turn the fuel valve to OFF and, if possible, drain the carb bowl using the drain screw.
- Remove the airbox cover, filter, and the bolts/nuts holding the airbox and carb to the engine.
- Gently pull the carb and airbox away just enough to see the throttle and governor linkages.
- Take clear photos of the linkages and springs before disconnecting them.
- Disconnect the fuel line and any small vacuum or breather hoses from the carb.
Place the carburetor on a clean bench or tray so you don’t lose small parts.
Step 4: Open the Float Bowl and Inspect
The float bowl is where most of the sludge and corrosion live:
- Remove the single bolt or screws holding the bowl to the carb body.
- Carefully lower the bowl, watching for a thin gasket or O-ring around the rim.
- Look for rust flakes, white crust, gel-like varnish, or water at the bottom.
- Clean the bowl with carb cleaner spray and a rag until it’s spotless.
If the fuel in the bowl smells sour or looks dark, it’s a strong indicator that internal passages and jets are also contaminated.
Step 5: Clean the Main Jet, Emulsion Tube, and Idle Passages
This step usually fixes the “needs choke to run” problem:
- Remove the float pin, then lift out the float and needle valve; keep them in order.
- Unscrew the main jet (often in the center of the carb where the bowl bolt passes through).
- Push out the emulsion tube above the main jet if accessible; it typically has multiple tiny side holes.
- Use a carb jet cleaning tool set or fine, soft wire to gently clear the main jet and emulsion tube. Do not enlarge the holes.
- Spray carb cleaner through the main jet well, idle circuits, and all visible passages until you see strong flow from other ports.
- Follow with compressed air (if available) to blow out any loosened debris.
Be patient here; a single partially blocked jet can force you back onto choke even after “cleaning.”
Step 6: Inspect and Replace Gaskets, O-Rings, and Needle
Old rubber parts are a common source of leaks and poor metering:
- Inspect the bowl gasket, float needle tip, and any O-rings on mixture screws or inlet fittings.
- Replace any parts that look flattened, cracked, or swollen using a model-matched carburetor repair kit.
- Verify that the float pivots freely on its pin and the needle moves freely in the seat.
- Check float height against the service spec if your manual provides one—too low can cause a lean condition, too high can flood.

APHP 796184 Carburetor Carb Repair Rebuild Kit for B&S 698787 699521 790032 792369 Master Overhaul Nikki Carb Replace Cub Cadet BS-796184 BS-698787 BS-790032

Valchoose Premium Torch Tip Cleaner, Stainless Steel Carburetor Cleaning Kit Heavy Duty, Density Nylon for Motorcycle Jet Lawnmower Small Engine Welding Stove Airbrush Spray Gun

Hipa Pack-of-14 Carburetor Adjustment Tool Carburator Adjusting Kit for 2-Cycle Small Engine Compatible with Poulan STHIL Echo Ryobi Troy Bilt Trimmer Weedeater Chainsaw
If your carb body itself is heavily corroded or warped, it may be wiser to replace the entire unit rather than rebuild it.
Step 7: Reassemble and Reinstall the Carburetor
Once everything is clean and inspected:
- Reinstall the main jet, emulsion tube, float, and needle in reverse order.
- Fit a clean or new bowl gasket and reinstall the bowl snugly.
- Mount the carb back onto the engine with the correct gasket stack between carb and intake.
- Reconnect throttle and governor linkages exactly as shown in your photos.
- Reconnect vacuum/breather hoses and the fuel line, replacing brittle hose with new fuel line.
- Reinstall the airbox and a clean air filter.
Turn the fuel valve ON and look closely for leaks at the bowl and fuel fittings before starting.
Step 8: Start, Warm Up, and Test Without Choke
Now you can see if the repair worked:
- Fill with fresh fuel if needed, then start the engine with the choke in the normal START position.
- As the generator warms up, slowly move the choke toward RUN.
- The engine should now continue running smoothly with the choke fully off.
- Connect a light to moderate load (work light, fan, or small tool) and verify stable operation under load.
If your carb has accessible idle and mixture screws, follow the engine manual’s procedure for fine-tuning. Some modern generator carbs have fixed jets and no mixture screws to adjust.
When It Makes Sense to Replace the Carburetor
Sometimes a carburetor is not worth saving:
- Severe, flaky corrosion in the bowl and passages
- Stripped threads for jets or bowl screws
- Warped mating surfaces causing persistent leaks
In those cases, buying a new, model-specific generator replacement carburetor is often faster and more reliable than repeated cleaning attempts.
YAMAKATO Huayi P27-1D Gasoline Generator Carburetor Kit OEM for Champion Predator Generac 420cc 439cc 459cc GX390 Powered 6500 8750 9000 5500 7000 8000 7500 9500 etc.……
TURBOTUNITY Generator Carburetor Kit for Predator 4000 4375 Champion Honda Generac 3500 4000 3000 4500 4375 3550 3650 GP 3250 3300 Watt 196cc 208cc 212cc 224cc etc.
SIMPERAC Carburetor for Predator 420cc Generator 9000 8750 7000 6500 5500 Watt 13HP 14HP 15HP 16HP Gasoline Portable Generator with Air Filter Fuel Shut-off Valve
Other Problems That Can Mimic Carb Issues
If the engine still insists on running only with choke after a thorough carb service, look at:
- Weak spark from a worn plug, failing ignition coil, or damaged plug wire.
- Low compression from worn rings, scored cylinder, or valve problems.
- Vacuum leaks at the intake manifold, carb spacer, or cracked boots.
If you suspect a deeper parts or wiring issue along with the carb trouble, walking through a more general diagnosis flow like the one in Generator Parts and Repairs can help you decide whether to keep troubleshooting yourself or get help.
Preventive Tips to Avoid “Only Runs on Choke” in the Future
Most carb problems trace back to storage and fuel habits:
- Use fresh, top-tier gasoline and avoid letting it sit in the tank for months.
- Add a quality fuel stabilizer if the generator will sit for more than 30–60 days.
- Exercise the generator monthly under load so fuel circuits stay active.
- For long storage, turn the fuel valve OFF and let the engine run until it stalls, so the carb bowl is mostly empty.
- When you’re comparing brands and parts support before buying, model-focused resources like Genmax Generator Parts can give you a feel for how easy future maintenance and carb replacements will be.
Summary
When a gas generator only runs with the choke on, you are almost always dealing with a lean fuel condition caused by a dirty or damaged carburetor or restricted fuel supply. By confirming good fuel flow, cleaning or rebuilding the carb (especially the main and idle circuits), and replacing tired gaskets and filters, most owners can bring a “choke-only” generator back to smooth, normal operation at home. Work slowly, take photos as you go, and your generator should go back to starting easily—and staying running—with the choke fully in the RUN position.

Savior Generator Petcock Fuel Gas Tank Switch Shut Off Valve for Predator Champion Generac Etq Homelite Husky Powermax Replace 0j0974 (16mm x 1.5mm)
(as of April 12, 2026 14:38 GMT +00:00 - More infoProduct prices and availability are accurate as of the date/time indicated and are subject to change. Any price and availability information displayed on [relevant Amazon Site(s), as applicable] at the time of purchase will apply to the purchase of this product.)
YAMAKATO Predator 9000 8750 6500 4000 4375 Generator Fuel Tank Shut Off Valve Fuel Petcock for Centurion Honda Westinghouse Duromax Durostar Powermate Powerhorse ETQ M16X1.5mm
(as of April 12, 2026 12:51 GMT +00:00 - More infoProduct prices and availability are accurate as of the date/time indicated and are subject to change. Any price and availability information displayed on [relevant Amazon Site(s), as applicable] at the time of purchase will apply to the purchase of this product.)
WEN GNA410 Generator Wheel and Handle Kit for WEN 4500 and 4750-Watt Generators (Black)
(as of April 12, 2026 12:53 GMT +00:00 - More infoProduct prices and availability are accurate as of the date/time indicated and are subject to change. Any price and availability information displayed on [relevant Amazon Site(s), as applicable] at the time of purchase will apply to the purchase of this product.)
WEN 55201 Magnetic Oil Dipstick for Inverter Generators (compatible with WEN, Yamaha, Predator)
(as of April 12, 2026 12:52 GMT +00:00 - More infoProduct prices and availability are accurate as of the date/time indicated and are subject to change. Any price and availability information displayed on [relevant Amazon Site(s), as applicable] at the time of purchase will apply to the purchase of this product.)About GeneratorStop.com
We are your #1 power generator guide and resource online. We are dedicated on providing you the best and most useful generator related articles, reviews and tools. learn more...