

How to Tell If Your Generator Stator or Rotor Is Bad (No Special Tools Needed)
* This site contains affiliate links for which we may be compensated.
* This site contains affiliate links for which we may be compensated.
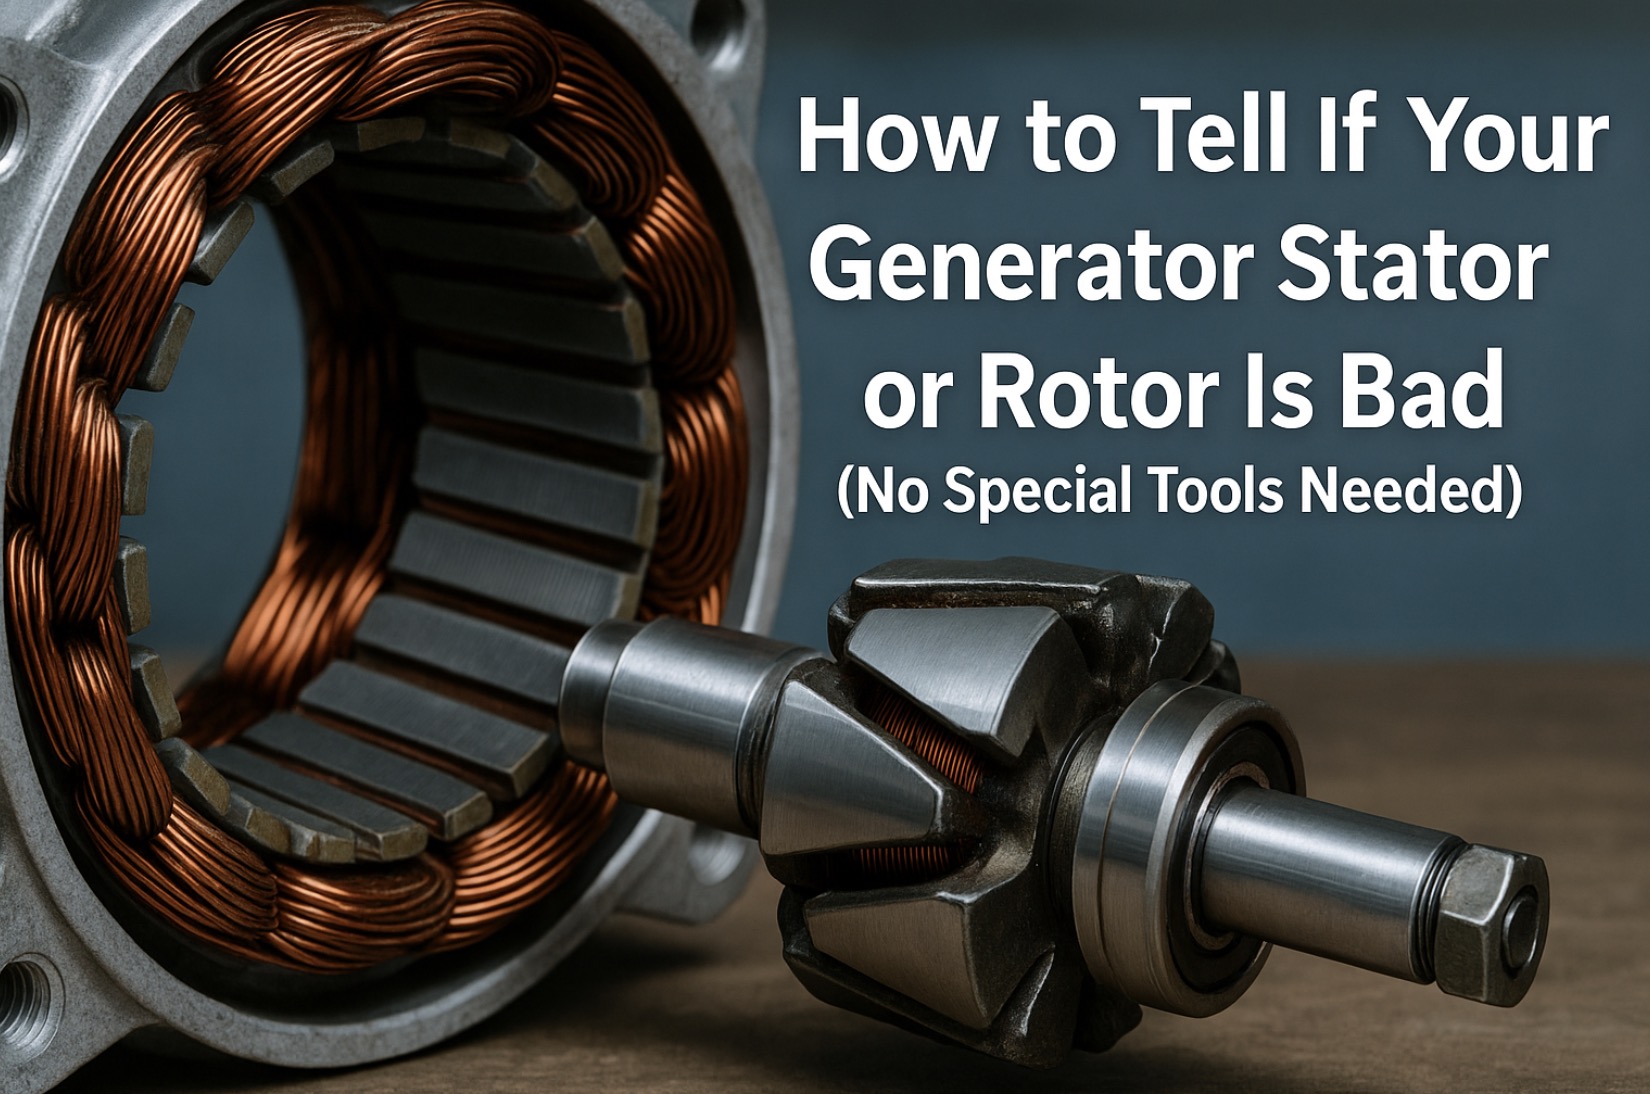
When your generator runs but delivers no power, or the voltage is weak and unstable, it is natural to wonder if the alternator itself is bad. The alternator is made up of two main pieces: the stationary windings (stator) and the rotating field (rotor). The good news is that you can often get a strong clue about which one is at fault using simple checks, basic hand tools, and—optionally—a cheap multimeter.
For a bigger-picture look at how the alternator, AVR, brushes, and other parts work together, it is worth reading the overview in Generator Parts and Repairs.
Common Symptoms of Stator or Rotor Problems
Not every “no power” issue means the stator or rotor is bad. Often, the culprit is an AVR, loose wire, or tripped breaker. Stator/rotor faults are more likely if you notice:
- Engine runs normally, but there is zero or very low AC voltage at all outlets.
- Voltage suddenly disappeared while the generator was under load (especially a heavy surge load).
- Strong burnt varnish smell from the alternator end of the generator.
- Visible burn marks or melted insulation on the stator windings when you remove the rear cover.
- Rust or severe corrosion on slip rings (for brushed rotors) and no magnetism at the rotor poles.
Before assuming the alternator is dead, always rule out simpler things like cords, breakers, and the AVR.

Tapa Stator Rotor Assembly for Harbor Freight Predator 9500 Invertor Generator
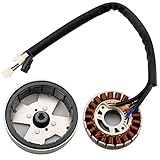
Tapa Stator Rotor Assembly for Harbor Freight Predator 2000/1600 Watt Invertor Generator

JJing Stator Rotor Assembly Compatible with Harbor Freight Predator 3500 Watt Inverter Generator
Safety First
Any time you are working around power equipment, treat it with respect:
- Shut the generator off and let it cool before removing covers.
- Turn the fuel valve off and disconnect the spark plug boot so it cannot start accidentally.
- Unplug all loads before testing or removing panels.
- Only test live voltage with a meter if you are comfortable doing so.
- Wear eye protection and keep fingers clear of moving parts.
Step 1: Rule Out Simple External Causes (No Tools)
Before you open anything, run through a quick checklist:
- Check the generator’s main breaker and any outlet breakers; reset anything that is tripped.
- If your outlets have GFCI buttons, press RESET.
- Test a different appliance or light you know works.
- Bypass power strips and long extension cords; plug directly into the generator.
- If the generator feeds a house via transfer switch, verify switch position and house breakers, similar to the logic used in “generator runs but no power to the house” style guides.
If the generator still shows no or very weak power after these checks, then it is time to look at the alternator.
Step 2: Quick Rotor Magnet Test (Brushed Generators)
On many conventional generators with brushes, the rotor has slip rings and pole shoes that should carry some magnetism when running.
- With the generator off and covers back on, remove the rear alternator cover (opposite the engine) using a screwdriver or socket.
- Locate the rotor in the center and identify the metal pole faces or slip ring area.
- Start the generator and very carefully bring a small screwdriver or paper clip close to the rotor pole area (keep clear of rotating parts).
- If the rotor is being excited properly, you should feel a noticeable tug as the metal is drawn toward the magnetic field.
- If there is absolutely no magnetism even when the engine is at speed, the rotor may not be getting field current (AVR/brush issue) or the rotor winding could be open.
This is not a precision test, but it gives you a quick, no-special-tool clue about whether the rotor is doing anything.
Step 3: Visual Inspection of Stator and Rotor
Next, look for obvious physical damage:
- With the engine off, covers removed, and spark plug disconnected, inspect the stator windings (the fixed copper coils around the inside of the housing).
- Look for dark, burnt-looking sections, melted varnish, or wires that have obviously overheated.
- Check for broken or loose leads where stator wires connect to the AVR or terminal block.
- On the rotor (if visible), look for burnt slip rings, broken wires to the rings, or obvious mechanical damage.
A stator or rotor that smells burned and has charred windings is usually a sign of a serious failure that will require rewinding or replacement.
Step 4: Basic Checks with a Cheap Multimeter (Optional but Helpful)
While the title says “no special tools,” a simple meter that many DIYers already own can sharpen your diagnosis. A basic digital multimeter is inexpensive and very useful here.
- With the generator off and unplugged, set your meter to the lowest ohms (resistance) or continuity setting.
- Measure resistance across the stator output leads (follow your wiring diagram if available). You should typically see a low but non-zero resistance; an open circuit (infinite ohms) usually means a broken winding or connection.
- If you can access rotor slip rings (on brushed units), measure resistance between the two rings. Again, you are looking for a small but non-zero reading. Infinite or zero ohms can indicate a problem.
- Check for shorts by measuring between each stator lead and the metal frame. There should be no continuity; a reading here can mean insulation breakdown.
You do not need exact factory numbers for a basic good/bad judgment. Open circuits, dead shorts, or a winding reading that is obviously different from a similar winding are the big red flags.
Step 5: Distinguish Between Stator, Rotor, and AVR Faults
Many people replace the AVR first because it is easier and cheaper than a stator. However, you can often narrow things down with simple logic:
- If the stator windings look clean, measure consistent resistance, and have no shorts to ground but there is no output, suspect the rotor (open/shorted winding or no excitation) or the AVR/brushes.
- If the rotor shows reasonable resistance and some magnetism, but one section of the stator is visibly burnt or reads differently from the others, the stator is more likely the issue.
- If both stator and rotor resistances look normal, but voltage is low, unstable, or too high, the AVR becomes the main suspect. In that case, a dedicated guide such as “How to Test and Replace a Generator AVR at Home” style walk-throughs will be more helpful than stator work.
As you check each component, take notes and photos—it will help if you later decide to seek professional repair or warranty service.
Tapa Stator Rotor Assembly for Harbor Freight Predator 9500 Invertor Generator
Tapa Stator Rotor Assembly for Harbor Freight Predator 2000/1600 Watt Invertor Generator
JJing Stator Rotor Assembly Compatible with Harbor Freight Predator 3500 Watt Inverter Generator
Step 6: When to Consider Brand Documentation or Pro Help
If your basic checks point toward a stator or rotor problem, it is worth consulting your generator’s official support documentation before spending money on parts.
- If your generator is under warranty, do not disassemble the alternator further without checking the terms.
- For portable units out of warranty, compare the cost of a new stator or rotor against the price of a whole alternator assembly or even a replacement generator.
- If your meter readings do not make sense or you are uncomfortable with electrical tests, it is perfectly reasonable to stop here and bring the notes to a technician.
Step 7: Preventive Habits That Protect the Stator and Rotor
Good operating habits go a long way toward preventing alternator failures:
- Avoid overloading the generator; keep continuous loads under about 75–80% of the rated output.
- Do not start large inductive loads (like big air conditioners or compressors) all at once; stagger high-surge loads.
- Keep the generator dry and sheltered from driving rain; moisture and dirt are hard on windings.
- Run the unit monthly under load to keep electrical contacts and windings in good condition.
- Follow oil and fuel maintenance practices similar to those discussed in 5W20 vs 5W30 vs 10W30 Oil – Which One to Use for Generators? so the engine side stays healthy and doesn’t stress the alternator.
If you are shopping for a new generator partly because of alternator concerns, detailed review pages like Westinghouse Generator Reviews (Dual Fuel, Inverter, Standby) can give you a feel for build quality, parts support, and how easy it is to access components like the stator, rotor, and AVR.
Summary
You do not need a bench full of specialized tools to get a good idea whether your generator stator or rotor is bad. By ruling out simple external issues, doing a basic magnet test, visually inspecting the windings, and (optionally) checking resistance with an inexpensive meter, you can often distinguish between a likely stator fault, rotor fault, or AVR problem. That information makes it much easier to decide whether to repair, replace parts, or put the money toward a new generator instead.

Savior Generator Petcock Fuel Gas Tank Switch Shut Off Valve for Predator Champion Generac Etq Homelite Husky Powermax Replace 0j0974 (16mm x 1.5mm)
(as of March 4, 2026 11:49 GMT +00:00 - More infoProduct prices and availability are accurate as of the date/time indicated and are subject to change. Any price and availability information displayed on [relevant Amazon Site(s), as applicable] at the time of purchase will apply to the purchase of this product.)
WEN 55201 Magnetic Oil Dipstick for Inverter Generators (compatible with WEN, Yamaha, Predator)
(as of March 4, 2026 12:15 GMT +00:00 - More infoProduct prices and availability are accurate as of the date/time indicated and are subject to change. Any price and availability information displayed on [relevant Amazon Site(s), as applicable] at the time of purchase will apply to the purchase of this product.)
WEN GNA410 Generator Wheel and Handle Kit for WEN 4500 and 4750-Watt Generators (Black)
(as of March 4, 2026 11:49 GMT +00:00 - More infoProduct prices and availability are accurate as of the date/time indicated and are subject to change. Any price and availability information displayed on [relevant Amazon Site(s), as applicable] at the time of purchase will apply to the purchase of this product.)
AKSGKGQ Fuel Gas Tank Grommet & Shut Off Valve Fit Coleman Powermate 4200 5000 Generator, MTD Cad Lawn Mower, Tiller replace 951-0171 Fuel Shut Off Valve 735-0149 Fuel Tank Bushing
(as of March 4, 2026 11:55 GMT +00:00 - More infoProduct prices and availability are accurate as of the date/time indicated and are subject to change. Any price and availability information displayed on [relevant Amazon Site(s), as applicable] at the time of purchase will apply to the purchase of this product.)About GeneratorStop.com
We are your #1 power generator guide and resource online. We are dedicated on providing you the best and most useful generator related articles, reviews and tools. learn more...