


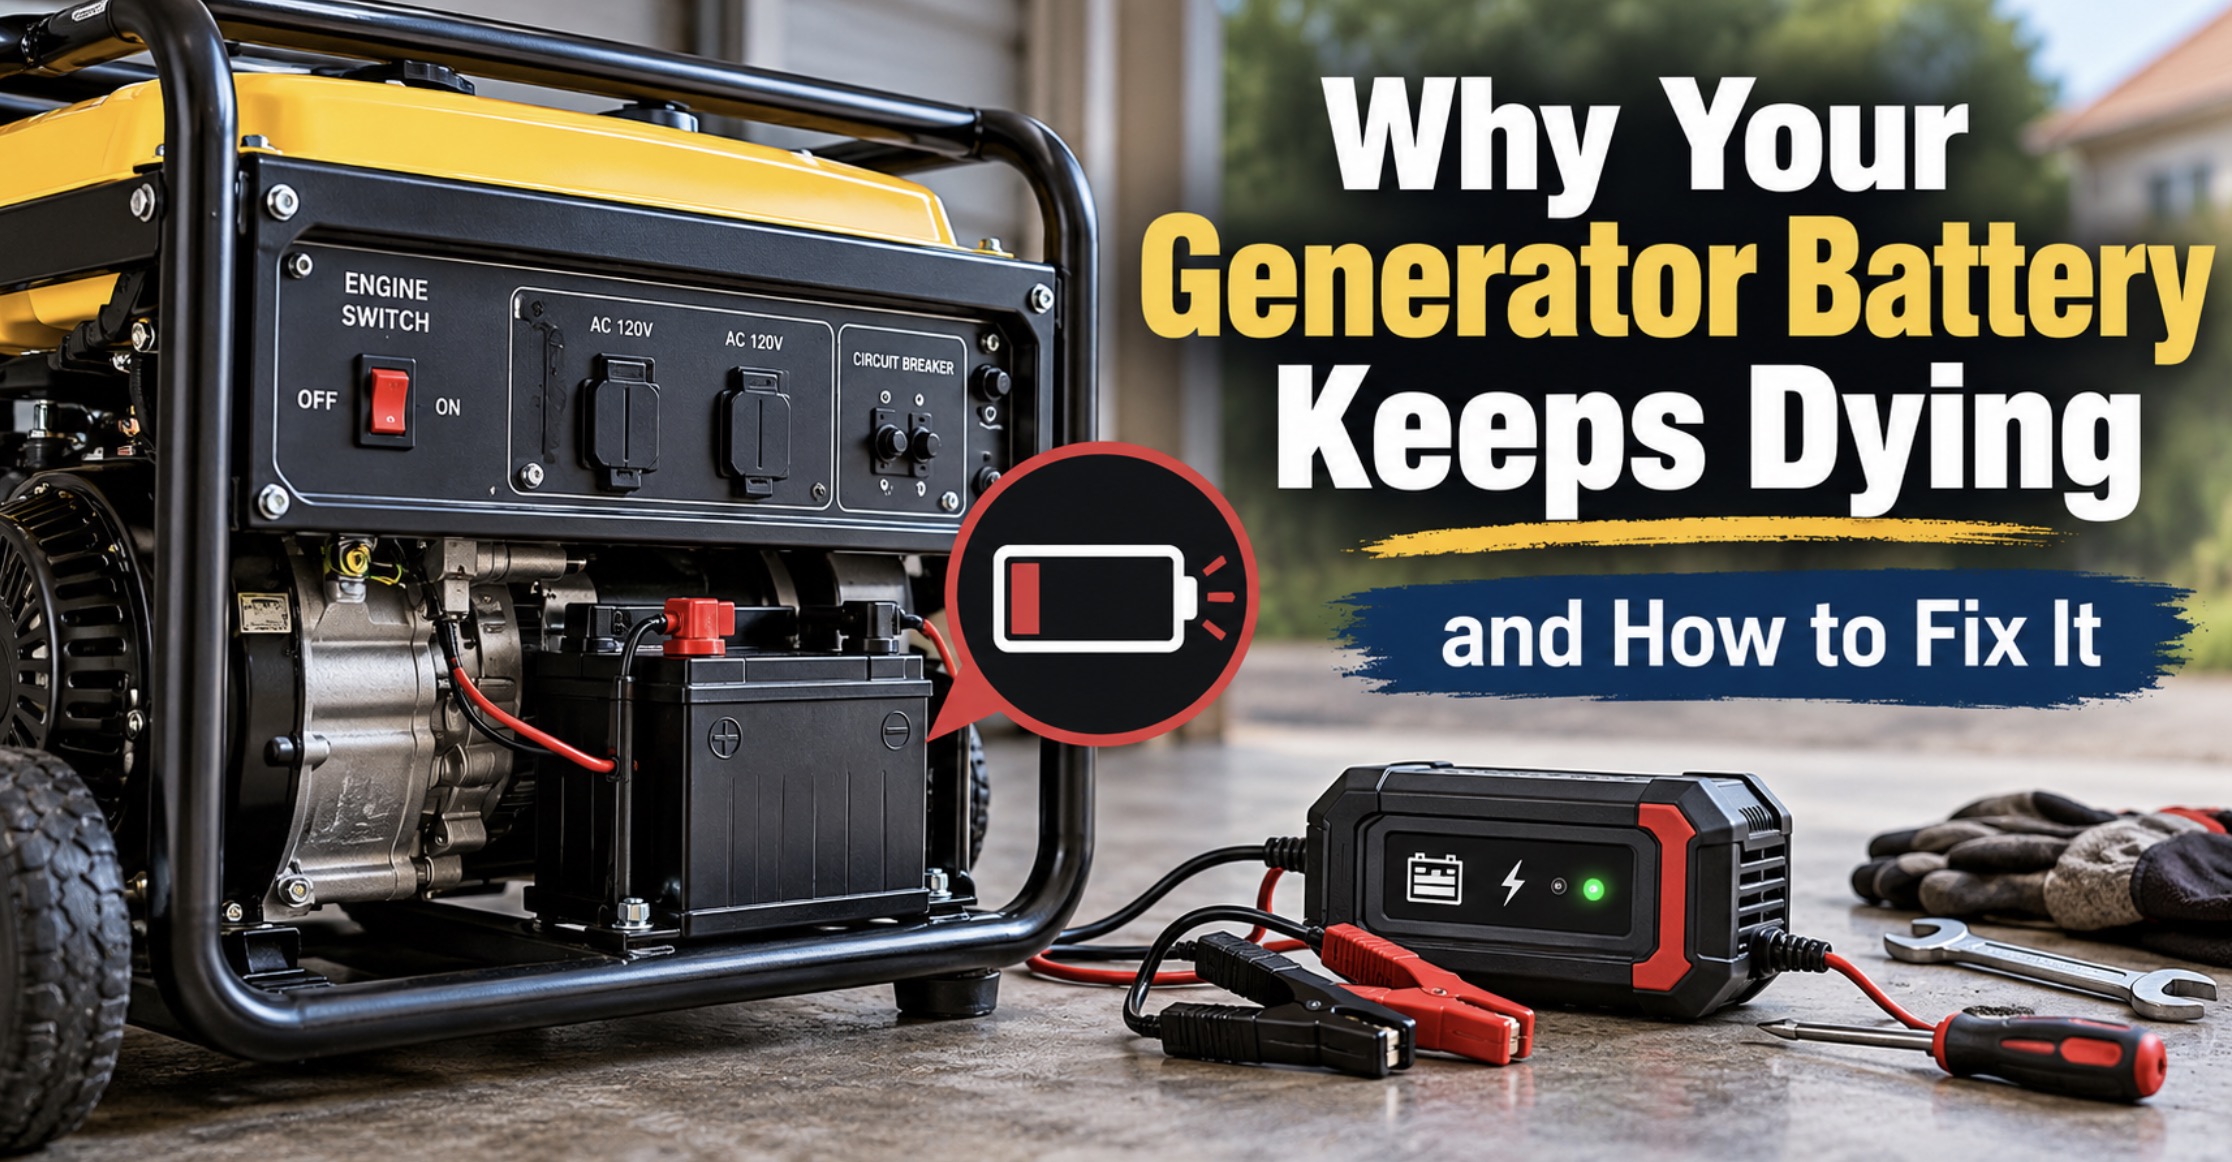
Why Your Generator Battery Keeps Dying and How to Fix It
* This site contains affiliate links for which we may be compensated.
A generator battery that keeps dying can be frustrating, especially when you need backup power during an outage and the electric starter only clicks or refuses to turn the engine. You may charge the battery, get the generator running again, and assume the problem is solved, only to discover a few days or weeks later that the battery is completely drained. In many cases, the battery itself is not the only problem. A faulty charging system, loose connections, parasitic electrical drain, poor storage habits, or an incompatible replacement battery may be responsible.
Generator batteries are designed to supply the electrical energy needed to crank the engine on electric-start models. Depending on the generator, the battery may be recharged while the engine runs, maintained through an external charger, or supported by a dedicated charging circuit. If any part of that system stops working correctly, even a relatively new battery can repeatedly lose its charge.
The good news is that many generator battery problems can be diagnosed at home using a digital multimeter, a suitable battery charger, and some basic hand tools. Before replacing the battery again, it is worth checking why it keeps losing power.
For a broader overview of generator components and troubleshooting, see Generator Parts and Repairs.
Common Signs Your Generator Battery Is Failing or Not Charging
A generator battery does not always fail suddenly. Sometimes it gradually becomes weaker, while other times it discharges overnight because another component is drawing power.
Common symptoms include:
- The electric starter clicks but does not turn the engine.
- The starter motor cranks slowly or struggles to turn the engine.
- The generator starts after charging the battery but fails again later.
- The battery becomes completely discharged after sitting for several weeks.
- The generator starts with the pull cord but not with the electric starter.
- The battery voltage remains low even after the generator has been running.
- The battery loses its charge unusually quickly.
- The battery terminals have white, green, or blue corrosion.
- The battery case appears swollen, cracked, or damaged.
- The generator’s battery warning indicator appears, if equipped.
These symptoms do not always mean the battery needs replacement. A failing starter motor, corroded ground cable, charging-system fault, or electrical drain can create similar problems.
Why Generator Batteries Keep Dying
Several issues can cause a generator battery to lose its charge repeatedly.
1. The Generator Sits Unused for Too Long
All batteries gradually lose charge while sitting. Lead-acid batteries also suffer from sulfation when they remain partially discharged for extended periods. If your generator only runs during occasional outages, the battery may lose enough energy between uses that it can no longer crank the engine.
2. The Charging System Is Not Working
Some generators have charging windings, rectifiers, or other components that recharge the starting battery while the engine runs. If the charging circuit fails, the battery may continue losing power even while the generator operates. Not all generators provide automatic battery charging, so check your model’s manual first.
3. The Battery Is Old or Worn Out
Lead-acid batteries have a limited service life. Repeated deep discharges, heat, cold, vibration, and inadequate maintenance can reduce battery capacity. Eventually, the battery may show an acceptable voltage but no longer supply enough current to operate the starter.
4. Loose or Corroded Battery Connections
Dirty terminals increase electrical resistance and interfere with charging and starting. Even a healthy battery may appear dead when the cables cannot deliver sufficient current to the starter motor.
5. Parasitic Electrical Drain
A connected accessory, control module, remote-start receiver, or faulty electrical component may continue consuming power while the generator is switched off.
6. The Wrong Battery Was Installed
A replacement battery with the wrong voltage, insufficient starting capacity, incompatible chemistry, or incorrect physical configuration may not work reliably.
7. A Faulty Starter Is Drawing Too Much Current
A worn starter motor, damaged solenoid, or mechanical engine problem can make starting difficult and quickly drain the battery.
8. Extreme Temperatures
Cold weather reduces available starting capacity, while excessive heat accelerates battery deterioration. Both conditions can contribute to repeated battery problems.
Step 1: Identify the Generator Battery Type
Before testing or replacing anything, determine what type of battery your generator uses.
Many portable electric-start generators use 12V lead-acid batteries, but the exact battery design and capacity vary by model.
Common battery types include:
- Flooded lead-acid batteries: Conventional batteries that may require electrolyte maintenance on serviceable models.
- AGM batteries: Absorbent glass mat batteries that are sealed and commonly used in portable equipment.
- Gel batteries: Sealed lead-acid batteries requiring compatible charging settings.
- Lithium batteries: Found on some generator models or aftermarket setups, with chemistry-specific charging and protection requirements.
Check the battery label for its nominal voltage, capacity, model number, terminal arrangement, and charging specifications.
Do not assume every generator uses the same battery simply because most electric-start models use 12V systems.
When shopping for a replacement, search for a 12V generator starting battery that matches your exact model and manufacturer requirements.
Step 2: Inspect the Battery for Physical Damage
A visual inspection can reveal problems before electrical testing begins.
Turn off the generator and disconnect any external charging equipment before inspecting the battery.
Look for:
- Cracks in the battery case
- Swelling or bulging
- Electrolyte leakage
- Corrosion around the terminals
- Loose battery cables
- Damaged insulation
- Rust around the battery tray
- Loose or missing battery hold-down hardware
A swollen, leaking, cracked, unusually hot, or severely damaged battery should not be charged or reused. Replace it with a compatible battery and dispose of the old one through an appropriate battery recycling program.
If the battery appears physically normal, continue with voltage testing.
Step 3: Check Battery Voltage With a Multimeter
A digital multimeter is one of the most useful tools for diagnosing generator battery problems.
For a conventional 12V lead-acid battery, voltage can provide a general indication of charge condition.
With the generator off and the battery rested after charging or use, typical approximate readings are:
- 12.6–12.8V: Generally indicates a fully charged 12V lead-acid battery.
- 12.4V: Usually indicates the battery is partially discharged.
- 12.2V: Suggests a significantly reduced state of charge.
- 12.0V: Indicates a heavily discharged battery.
- Below 12.0V: Indicates substantial discharge and the need for further testing.
These figures are approximate and apply primarily to rested lead-acid batteries. AGM, flooded, gel, and lithium batteries may have different voltage characteristics.
A battery that reads 12.6V is not automatically healthy. A worn battery may hold normal open-circuit voltage but fail when the starter requires high current.
A basic digital multimeter makes it possible to check resting voltage, charging voltage, and many other electrical problems around the generator.
Step 4: Charge the Battery Properly
If the battery is discharged but physically undamaged, charge it using equipment appropriate for its battery chemistry, voltage, and capacity.
A compatible smart charger can help restore charge without requiring you to manually monitor the charging process constantly.
General charging procedure:
- Turn off the generator completely.
- Disconnect the battery or follow the manufacturer’s approved in-place charging procedure.
- Inspect the battery and terminals for damage.
- Connect the charger according to the battery and charger instructions.
- Select the correct battery type and charging mode.
- Allow the battery to complete its charging cycle.
- Disconnect the charger safely.
- Allow the battery to rest before checking its voltage.
Avoid using an oversized charger or an incompatible charging mode. Small generator batteries may have much lower charging-current limits than automotive batteries.
A 12V smart battery charger and maintainer is useful for many lead-acid generator batteries when the charger is properly matched to the battery.
Never attempt to charge a frozen, leaking, swollen, or otherwise damaged battery.
MOTOPOWER MP00205A 12V 800mA Automatic Battery Charger, Maintainer, Trickle and Desulfator

WEN 12V Deluxe Battery Maintainer and Float Charger with SAE Quick-Connector (GNA12C)

Battery Tender Junior 12V, 750mA Charger and Maintainer: Automatic 12V Powersports for Motorcycle, ATVs, and More - Smarter Than a Trickle Charger - 021-0123
Step 5: Test Whether the Battery Holds Its Charge
After fully charging the battery, determine whether it can retain energy.
A battery that repeatedly loses voltage with no electrical load connected may have excessive self-discharge or internal damage.
A basic test involves:
- Fully charging the battery with the correct charger.
- Allowing it to rest according to the manufacturer’s recommendations.
- Recording the resting voltage.
- Disconnecting it from the generator if appropriate.
- Rechecking the voltage after a suitable period.
If the disconnected battery loses substantial charge unusually quickly, it may be failing internally.
However, voltage alone cannot determine full battery health. A battery load test or conductance test can help reveal weak capacity that a basic voltage measurement misses.
If the battery passes testing while disconnected but drains after being reconnected to the generator, an electrical drain becomes more likely.
Step 6: Check the Battery Terminals and Ground Connections
Corrosion and loose connections are among the easiest generator battery problems to repair.
A small amount of corrosion can create enough resistance to reduce starter performance or interfere with charging.
Look for:
- White or green deposits on battery terminals
- Loose terminal bolts
- Damaged cable ends
- Frayed battery wires
- Corroded ground connections
- Heat-damaged terminal insulation
To inspect and service the connections:
- Turn the generator off and disconnect charging equipment.
- Disconnect the negative battery cable first, then the positive cable, unless the manufacturer specifies a different procedure.
- Clean accessible corrosion using suitable battery terminal cleaning products.
- Inspect the cable ends for deterioration.
- Replace badly corroded or damaged connectors.
- Reconnect the positive cable first and the negative cable last on a conventional negative-ground system.
- Confirm that the terminals are secure.
Use eye protection and gloves when working around lead-acid batteries.
A battery terminal cleaning brush and appropriate battery terminal protector can help keep electrical connections in good condition.
Step 7: Check Whether the Generator Charges Its Own Battery
One of the most misunderstood generator battery problems involves the charging system.
Many owners assume that because the generator engine is running and producing AC power, the starting battery must automatically be charging.
That is not true for every generator.
Depending on the model, battery charging may be handled by:
- A dedicated engine charging winding
- A rectifier or regulator circuit
- An integrated battery charging system
- An external battery charger
- A standby generator’s automatic charging system
Some portable generators require external charging during storage or between uses.
Before diagnosing a failed charging system, confirm whether your model is designed to recharge the starting battery while running.
If the generator includes an automatic charging system, the manual should explain how to test it and what voltage or current readings to expect.
Step 8: Measure Charging Voltage
On models equipped with an engine-driven battery charging system, measuring battery voltage while the engine is running may help identify charging problems.
For some conventional 12V lead-acid charging systems, charging voltage may rise into approximately the 13.5–14.8V range, depending on the design, temperature, and battery condition.
However, this range is not universal. Some generator charging systems operate differently or provide limited unregulated charging.
A qualified person can compare the measured battery voltage with the manufacturer’s charging specifications.
Potential warning signs include:
- Battery voltage never rises despite a charging system that should be active.
- The battery continues discharging during normal operation.
- Charging voltage is consistently outside the manufacturer’s specified range.
- The battery becomes unusually hot while charging.
- The battery repeatedly loses charge after extended generator operation.
Do not assume a rectifier or charging coil is defective based only on a generic automotive charging-voltage range.
The correct diagnosis depends on the generator’s wiring diagram and charging-system design.
Step 9: Inspect the Charging Rectifier or Regulator
Some generators use a rectifier to convert alternating current from a charging winding into direct current for the battery.
Other models use additional regulation to control charging voltage.
If the rectifier or regulator fails, the battery may stop charging or receive improper charging voltage.
Possible symptoms include:
- Repeated battery discharge despite regular generator operation
- No charging voltage at the battery
- Blown charging-system fuse
- Damaged charging-system wiring
- Excessive charging voltage on systems with voltage regulation
- A rectifier that has visibly overheated or failed
Before replacing a charging-system component, inspect the related fuses, connectors, and wiring.
A replacement generator battery charging rectifier must match the generator’s electrical design.
Do not confuse the battery charging rectifier with the main alternator AVR or inverter module. These components perform different functions.
Step 10: Check for Parasitic Battery Drain
A parasitic drain happens when an electrical component continues drawing battery power while the generator is switched off.
Small standby or electronic loads can discharge a battery over time, especially if the generator sits unused for weeks.
Possible sources include:
- Remote-start receiver modules
- Electronic control panels
- Digital displays that remain powered
- Faulty relays
- Damaged wiring
- Aftermarket accessories
- Incorrectly wired battery chargers
- Faulty electrical control components
Some standby generators and remote-start models normally draw a small amount of standby current.
A parasitic drain is only abnormal when it exceeds the manufacturer’s expected standby consumption or discharges the battery faster than the charging arrangement can maintain it.
Step 11: How to Check for Parasitic Drain
Parasitic-current testing involves measuring the electrical current consumed by the generator while it is turned off.
A properly rated DC current clamp meter may be suitable for some systems, while other systems require a series-current measurement using manufacturer-approved procedures.
Because incorrect current-meter connections can damage the meter, short the battery, or cause sparks, do not improvise this test.
If you have appropriate electrical experience, compare the generator’s standby current with the manufacturer’s specifications.
If the drain is higher than expected, inspect accessories, control modules, wiring, and charging components.
A DC clamp meter with low-current measurement capability may be useful for diagnosing electrical drains on compatible systems.
If you are unfamiliar with electrical current testing, have a qualified technician perform this check.
Step 12: Inspect the Starter Motor and Starter Solenoid
Sometimes the battery is not actually the root cause of the starting problem.
A worn starter motor may draw excessive current or turn too slowly even when the battery is fully charged.
A failing starter solenoid can also cause clicking, intermittent engagement, or complete starting failure.
Possible starter-related symptoms include:
- A single click when the start button is pressed
- Rapid clicking
- Slow engine cranking despite a fully charged battery
- Intermittent starting
- Starter motor becoming unusually hot
- Voltage dropping excessively during cranking
However, these symptoms can also be caused by poor battery connections or a weak battery.
Before replacing the starter, verify battery condition, cable integrity, ground connections, and the generator’s starting circuit.
Step 13: Check the Battery Voltage During Cranking
A battery may show normal voltage at rest but fail when the starter motor demands high current.
Measuring voltage during cranking can reveal excessive voltage drop.
For some conventional 12V lead-acid starting batteries, a cranking voltage substantially below approximately 9.6V under standardized test conditions may indicate a weak battery.
However, actual acceptable cranking voltage depends on battery temperature, battery design, starter load, and manufacturer specifications.
If voltage drops sharply:
- Check the battery’s state of charge.
- Inspect terminals and cable connections.
- Check the ground cable.
- Have the battery load-tested.
- Investigate the starter motor if the battery tests healthy.
Do not rely on one voltage reading to determine whether the battery or starter motor is defective.
Step 14: Make Sure the Battery Is Properly Sized
Installing a battery that physically fits is not enough.
The replacement battery must meet the generator’s electrical and mechanical requirements.
Check:
- Nominal voltage
- Battery chemistry
- Amp-hour capacity
- Cold-cranking or starting-current rating where specified
- Terminal polarity
- Terminal location
- Physical dimensions
- Mounting and vibration requirements
An undersized battery may work temporarily in warm weather but fail during cold starts or after several starting attempts.
A battery with the wrong chemistry may also be incompatible with the generator’s charging system.
Step 15: Check for Corrosion and Moisture Around the Battery Compartment
Generators are often stored in garages, sheds, trailers, or outdoor storage areas where moisture and condensation can accumulate.
Over time, moisture may corrode battery terminals, fuse holders, connectors, and ground points.
Inspect the battery compartment for:
- Rust on mounting brackets
- Corrosion on terminal connections
- Damaged wire insulation
- Water accumulation
- Loose battery straps
- Evidence of rodent damage
Clean accessible corrosion and replace damaged electrical components.
Avoid spraying large amounts of water or cleaning chemicals around battery connections and electronic control modules.
Step 16: Use a Battery Maintainer During Storage
One of the most effective ways to prevent repeated battery discharge is to use a compatible battery maintainer during extended storage.
A battery maintainer is designed to keep a battery charged without continuously applying an uncontrolled high charging current.
For generators that sit unused for weeks or months, a suitable maintainer can help prevent deep discharge and lead-acid battery sulfation.
Benefits include:
- Maintaining battery charge between uses
- Reducing repeated deep discharges
- Improving the chances of reliable electric starting
- Reducing battery deterioration caused by prolonged undercharging
- Keeping emergency backup generators ready for outages
Choose a maintainer that matches the battery’s voltage, capacity, and chemistry.
A 12V automatic battery maintainer for small engines may be suitable for many lead-acid generator batteries.

ExpertPower YTX14-BS 12V 14Ah AGM SLA Motorcycle Battery, 220 CCA | Vibration Resistant ATV / UTV Replacement Batteries Compatible with select ATVs, Scooters, Snowmobiles and Motorcycles

Mighty Max Battery ML18-12 - 12 Volt 18 AH, Nut and Bolt (NB) Terminal, Rechargeable SLA AGM Battery
Step 17: Follow a Proper Generator Exercise Schedule
Running your generator periodically can help identify battery and starting problems before an emergency.
However, generator exercise does not always provide enough charging time to restore a discharged battery.
A short run may help confirm that the engine starts, but it should not be treated as a substitute for proper battery charging unless the manufacturer states otherwise.
A good exercise routine includes:
- Checking battery condition before starting.
- Inspecting battery connections.
- Starting the generator according to the manual.
- Running it for the recommended duration.
- Applying an appropriate electrical load when recommended.
- Checking for starting or charging problems.
- Recording the exercise date.
If your generator has been sitting for months and refuses to start, battery discharge may be only one possible cause. See Generator Won’t Start After Sitting? Here’s Why for other storage-related problems involving fuel, carburetors, ignition, and oil.
Step 18: Understand Cold-Weather Battery Problems
Cold temperatures reduce the available starting performance of many batteries.
At the same time, cold engine oil increases the effort required to crank the engine.
This combination can make an older battery appear completely dead during winter.
Cold-weather precautions include:
- Keeping the battery fully charged.
- Using the manufacturer-recommended oil viscosity.
- Inspecting battery terminals for corrosion.
- Testing the battery before winter storms.
- Replacing batteries that fail load testing.
- Following the manufacturer’s cold-weather starting procedure.
Never use an indoor generator operating location to keep the battery or engine warm. Fuel-powered generators must be operated outdoors in a safe, well-ventilated location.
Step 19: Avoid Deeply Discharging the Battery
Repeated deep discharge is particularly damaging to batteries designed mainly for engine starting.
A starting battery is intended to provide a short burst of high current rather than continuously power accessories.
Avoid:
- Repeatedly cranking the engine for long periods.
- Leaving the generator ignition switch on unnecessarily.
- Powering aftermarket accessories from the starting battery for extended periods.
- Allowing the battery to remain discharged for weeks.
- Using an incompatible charger.
If the engine will not start after several attempts, stop cranking and investigate the underlying cause.
Repeated starting attempts can discharge the battery and overheat the starter motor.
Step 20: Know When the Battery Needs Replacement
Not every repeatedly discharged battery can be restored.
Replacement is usually the more practical option when:
- The battery fails a proper load test.
- It cannot hold sufficient charge after correct charging.
- The case is swollen, cracked, or leaking.
- The terminals are severely damaged.
- The battery is significantly deteriorated from repeated deep discharge.
- Internal failure is suspected.
- The battery is near the end of its expected service life and starting reliability has become poor.
A replacement battery should always match the generator manufacturer’s specifications.
Before installing a new battery, investigate charging-system and parasitic-drain problems. Otherwise, the replacement may develop the same symptoms.
Generator Battery Troubleshooting Chart
The following symptoms can help narrow down the most likely causes.
| Symptom | Possible Cause | What to Check |
|---|---|---|
| Starter clicks but does not crank | Weak battery, loose terminals, solenoid problem | Battery voltage, cables, starter circuit |
| Battery dies after several weeks | Self-discharge, standby drain, inadequate maintenance | Battery condition and standby current |
| Battery dies after generator operation | Charging-system fault or inadequate charging time | Charging circuit and manufacturer specifications |
| Battery voltage looks normal but starter is slow | Weak battery under load, cable resistance, starter issue | Battery load test and voltage drop |
| New battery dies quickly | Parasitic drain, charging fault, incorrect battery | Battery compatibility and electrical system |
| Battery overheats while charging | Charging fault, internal battery damage | Stop charging and inspect professionally |
| Generator starts by pull cord but not electric start | Battery, solenoid, starter, cable problem | Starting circuit and battery condition |
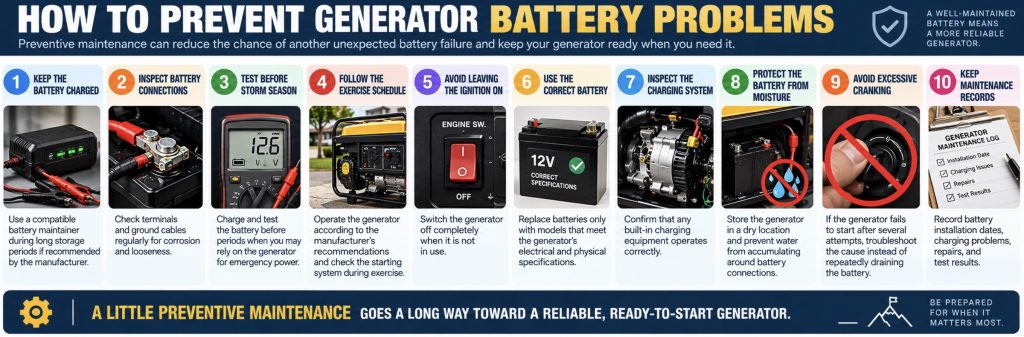
How to Prevent Generator Battery Problems
Once you identify and repair the problem, preventive maintenance can reduce the chance of another unexpected battery failure.
1. Keep the Battery Charged
Use a compatible battery maintainer during long storage periods if recommended by the manufacturer.
2. Inspect Battery Connections
Check terminals and ground cables regularly for corrosion and looseness.
3. Test Before Storm Season
Charge and test the battery before periods when you may rely on the generator for emergency power.
4. Follow the Exercise Schedule
Operate the generator according to the manufacturer’s recommendations and check the starting system during exercise.
5. Avoid Leaving the Ignition On
Switch the generator off completely when it is not in use.
6. Use the Correct Battery
Replace batteries only with models that meet the generator’s electrical and physical specifications.
7. Inspect the Charging System
Confirm that any built-in charging equipment operates correctly.
8. Protect the Battery From Moisture
Store the generator in a dry location and prevent water from accumulating around battery connections.
9. Avoid Excessive Cranking
If the generator fails to start after several attempts, troubleshoot the cause instead of repeatedly draining the battery.
10. Keep Maintenance Records
Record battery installation dates, charging problems, repairs, and test results.
Frequently Asked Questions
Why does my generator battery keep dying even when the generator is off?
The battery may be losing charge naturally during storage, suffering from internal deterioration, or supplying power to a component that remains active while the generator is switched off.
Does a generator automatically charge its starting battery while running?
Not always. Some models have an engine-driven charging system, while others require an external charger. Check your owner’s manual.
Can a generator run with a dead starting battery?
Some portable generators with manual recoil starting can run without a functioning electric-start battery. However, certain electronic-start, fuel-injected, or electronically controlled models may require battery power to operate.
How long should a generator battery last?
Battery lifespan varies with chemistry, temperature, charging habits, starting frequency, and maintenance. Many lead-acid starting batteries last several years, but poor storage conditions can shorten their life substantially.
Can I use a car battery in my generator?
Only if it meets the generator manufacturer’s electrical, mounting, terminal, and charging requirements. A physically larger battery is not automatically a suitable replacement.
What voltage should a fully charged generator battery show?
A rested, fully charged conventional 12V lead-acid battery typically measures approximately 12.6–12.8V. Different chemistries may have different voltage characteristics.
Why does my generator battery die after only one starting attempt?
The battery may have very low usable capacity, the engine may be difficult to crank, or the starter motor may be drawing excessive current.
Will running my generator for 10 minutes charge the battery?
Not necessarily. Charging ability and charging rate depend on the generator design. A short run may not replenish the energy used during starting.
Can a bad rectifier drain the battery?
A failed rectifier may prevent charging, and certain internal failures may create an unwanted electrical drain. The exact behavior depends on the charging-system design.
Should I disconnect the battery when storing my generator?
Disconnecting the battery may reduce generator-related standby drain on some models, but not all generators should be stored disconnected. Follow the owner’s manual, especially for standby generators with automatic starting and battery maintenance systems.
Can cold weather make a generator battery seem dead?
Yes. Cold temperatures reduce available battery starting performance and increase engine cranking resistance.
Is a battery maintainer better than occasionally charging the battery?
A compatible automatic maintainer can be more convenient for long-term storage because it keeps the battery charged according to the charger’s maintenance program. The charger must match the battery chemistry and manufacturer’s requirements.
When to Call a Generator Repair Technician
Many generator battery problems involve straightforward maintenance, but some situations require professional electrical diagnosis.
Seek qualified assistance when:
- The battery repeatedly dies despite being tested healthy.
- The generator does not charge the battery even though it has a built-in charging system.
- Charging voltage is outside manufacturer specifications.
- The starter motor overheats or draws excessive current.
- Parasitic electrical drain cannot be identified.
- The battery compartment contains melted wiring or burned connectors.
- The generator’s electronic control module is suspected.
- The generator is a permanently installed standby system with automatic-start controls.
- The battery becomes unusually hot, swollen, or leaks.
A qualified technician can perform battery load testing, starter voltage-drop testing, charging-system diagnosis, and electrical-current measurements without unnecessarily replacing parts.
Summary
A generator battery that keeps dying is not always a defective battery. The problem may be caused by long storage periods, a faulty charging system, corroded terminals, parasitic electrical drain, a worn starter motor, extreme temperatures, or an incorrectly sized replacement battery.
Start by inspecting the battery, checking its resting voltage, charging it properly, and performing a battery load test if necessary. Next, inspect the terminals and ground cables, confirm whether your generator has a built-in charging system, and investigate abnormal standby electrical consumption.
For generators stored between power outages, a compatible battery maintainer and regular testing can significantly improve starting reliability. Most importantly, identify the cause of repeated discharge before purchasing another replacement battery. Fixing the underlying problem will help keep your generator ready when you need emergency power.
Savior Generator Petcock Gas Fuel Tank Shut Off Valve for Champion Generac | 0j0974,Switch,Predator Etq Homelite Husky Powermax,(16mm x 1.5mm)

Generac 5W-20 Maintenance Kit for 20Kw-26Kw 999cc Generators (Replaces A0002074712)

Pull Start Assembly with Start Cup Compatible with Honda GX120 GX160 GX200 | Recoil Starter Compatible with 28400-ZE1-003ZF 28400-ZH8-013YA Pull Starter Engine 4/5.5/6.5hp Motor (2 PACK)

YGQ Generator Fuel Shut Off Valve for Predator 4000 6500 Generac 0J0974 | M16x1.5mm fuel Petcock for Honda Centurion Duromax Powermate Powerhorse ETQ Gas Tank

GNA410 Generator Wheel and Handle Kit for W-EN 4500 and 4750-Watt Generators, Compatible with W-EN DF475T, DF475, GN4500, DF472, DF475X, DF472X
About GeneratorStop.com
We are your #1 power generator guide and resource online. We are dedicated on providing you the best and most useful generator related articles, reviews and tools. learn more...